Authentication in ASP.NET Core Web API with Amazon Cognito
Amazon Cognito is the user management and authentication product in AWS. It allows for unified sign-up and sign-in flows across web and mobile apps.
I like it particularly for its pricing: Free for the first 50,000 monthly active users. The next 50,000 will cost you half a penny. Think you can sell your Director on that?
This article will show you how to set up Amazon Cognito in AWS, then configure Authentication for a Web API project to use Bearer tokens.
If you’d like to skip setting up Amazon Cognito in AWS, you can skip straight to the C# portion for code samples.
Table of Contents
1. Create a User Pool
2. Create an App Client
3. Add authentication to Web API
4. Register Users
5. Authenticate Users
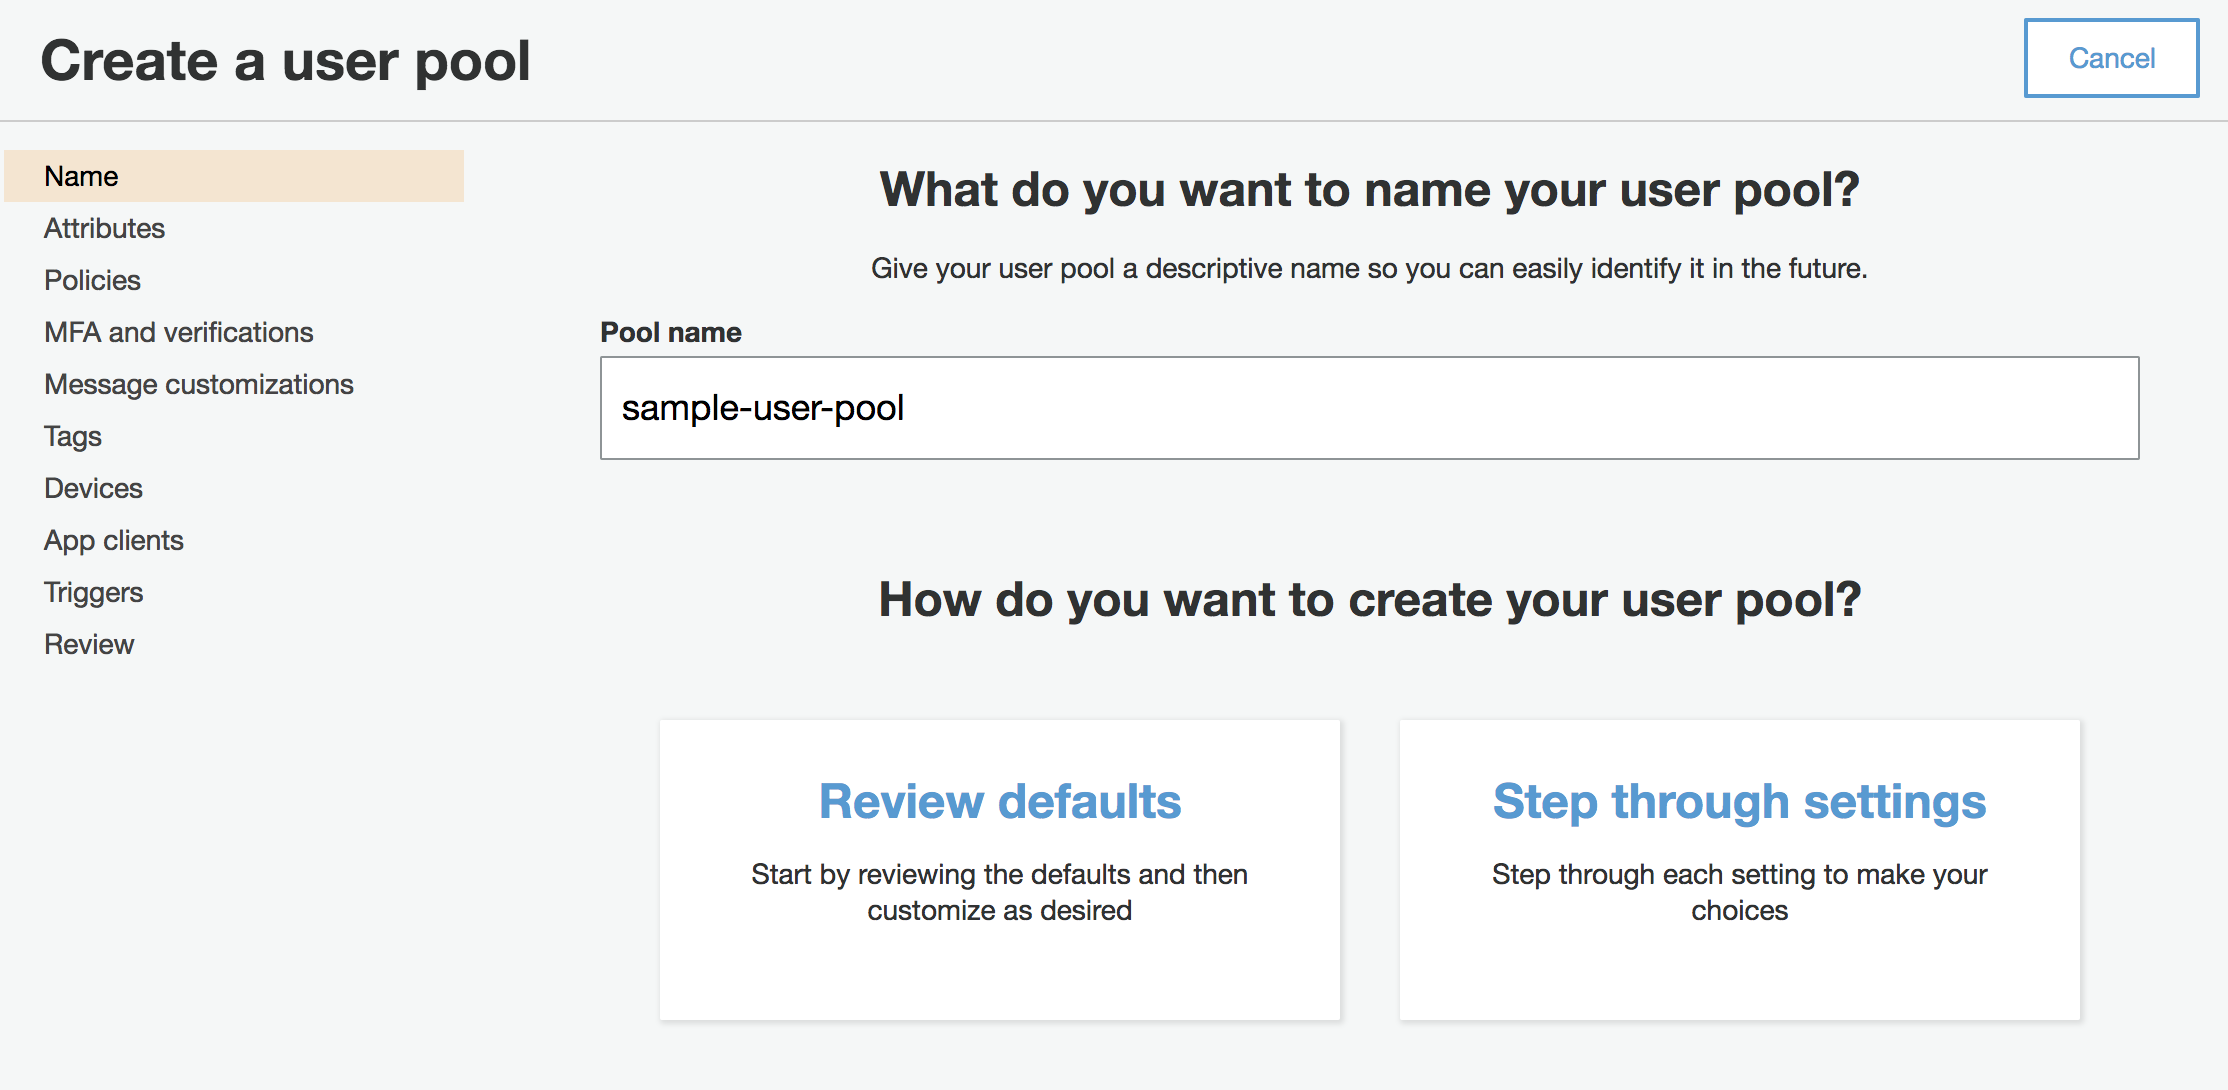
Create a User Pool
Navigate to the Cognito home page from the AWS Management Console. You can search for Cognito in the AWS services search box, or click the link under the Services dropdown under “Security, Identity & Compliance”.
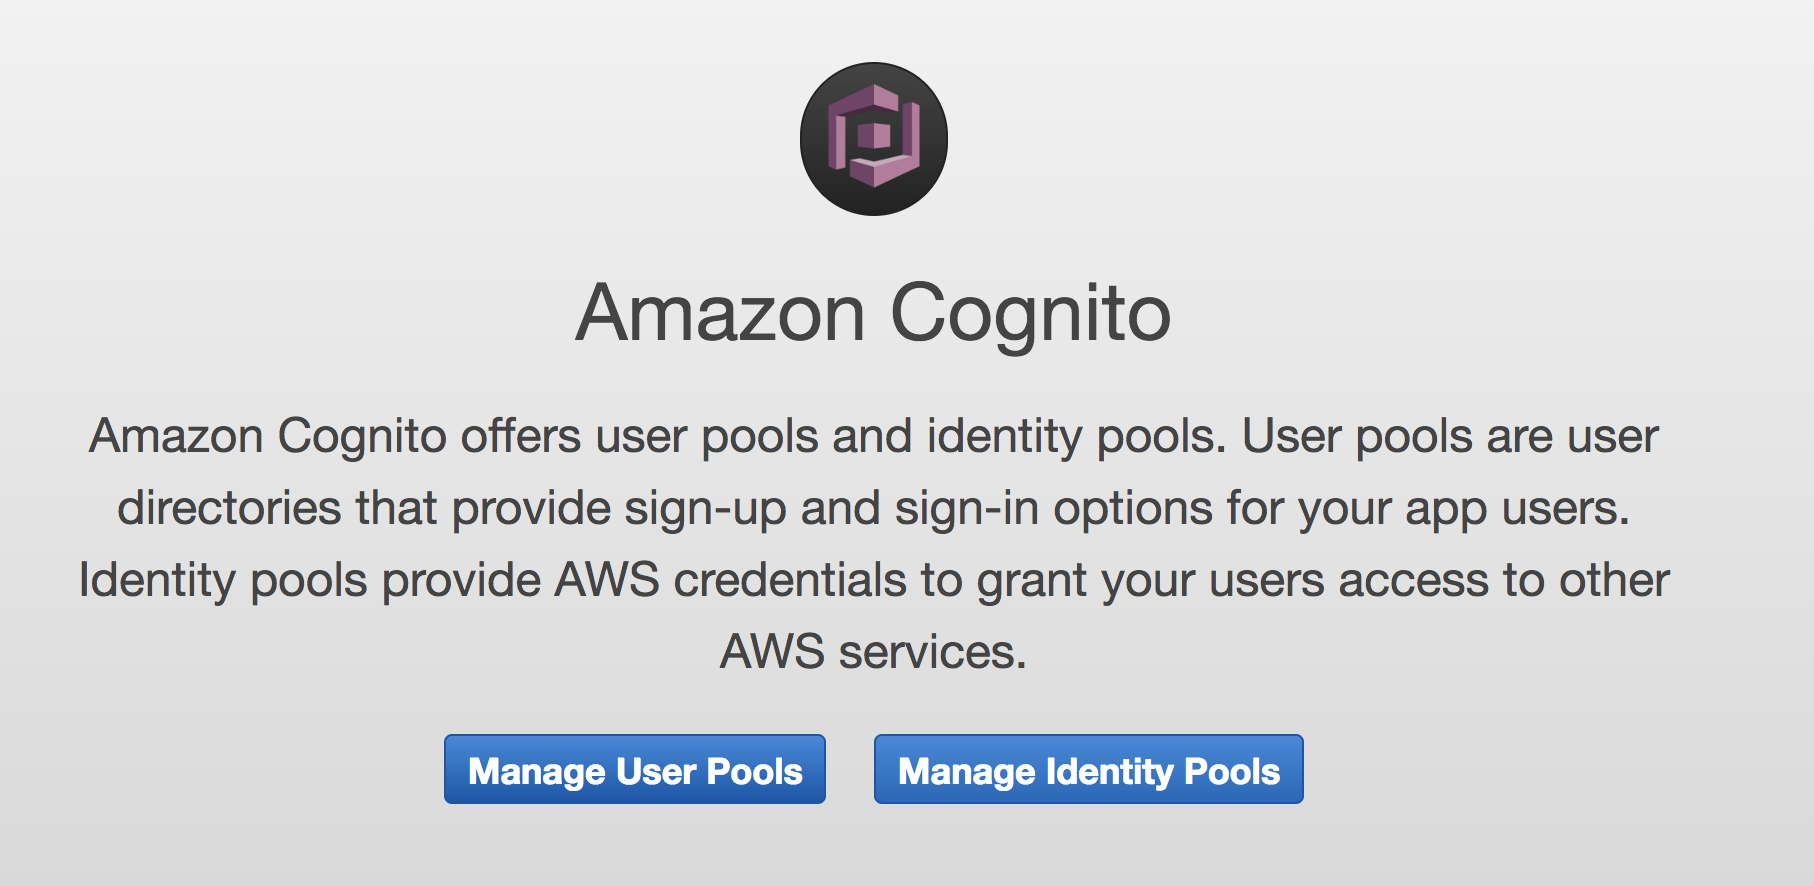
From there you’ll see that Cognito is split into two parts: User Pools and Identity Pools. Identity Pools grant access to AWS services, but User Pools are what we want for API authentication.
Click on “Manage User Pools” and “Create a user pool”. Click either “Review defaults” or “Step through settings” to create the app pool. If you follow the defaults, you may want to adjust the aggressive default password policy.
Create an App Client
Each of your applications utilizing a Cognito User Pool is called an “app client”. You will need to register your Web API application with Cognito in this way.
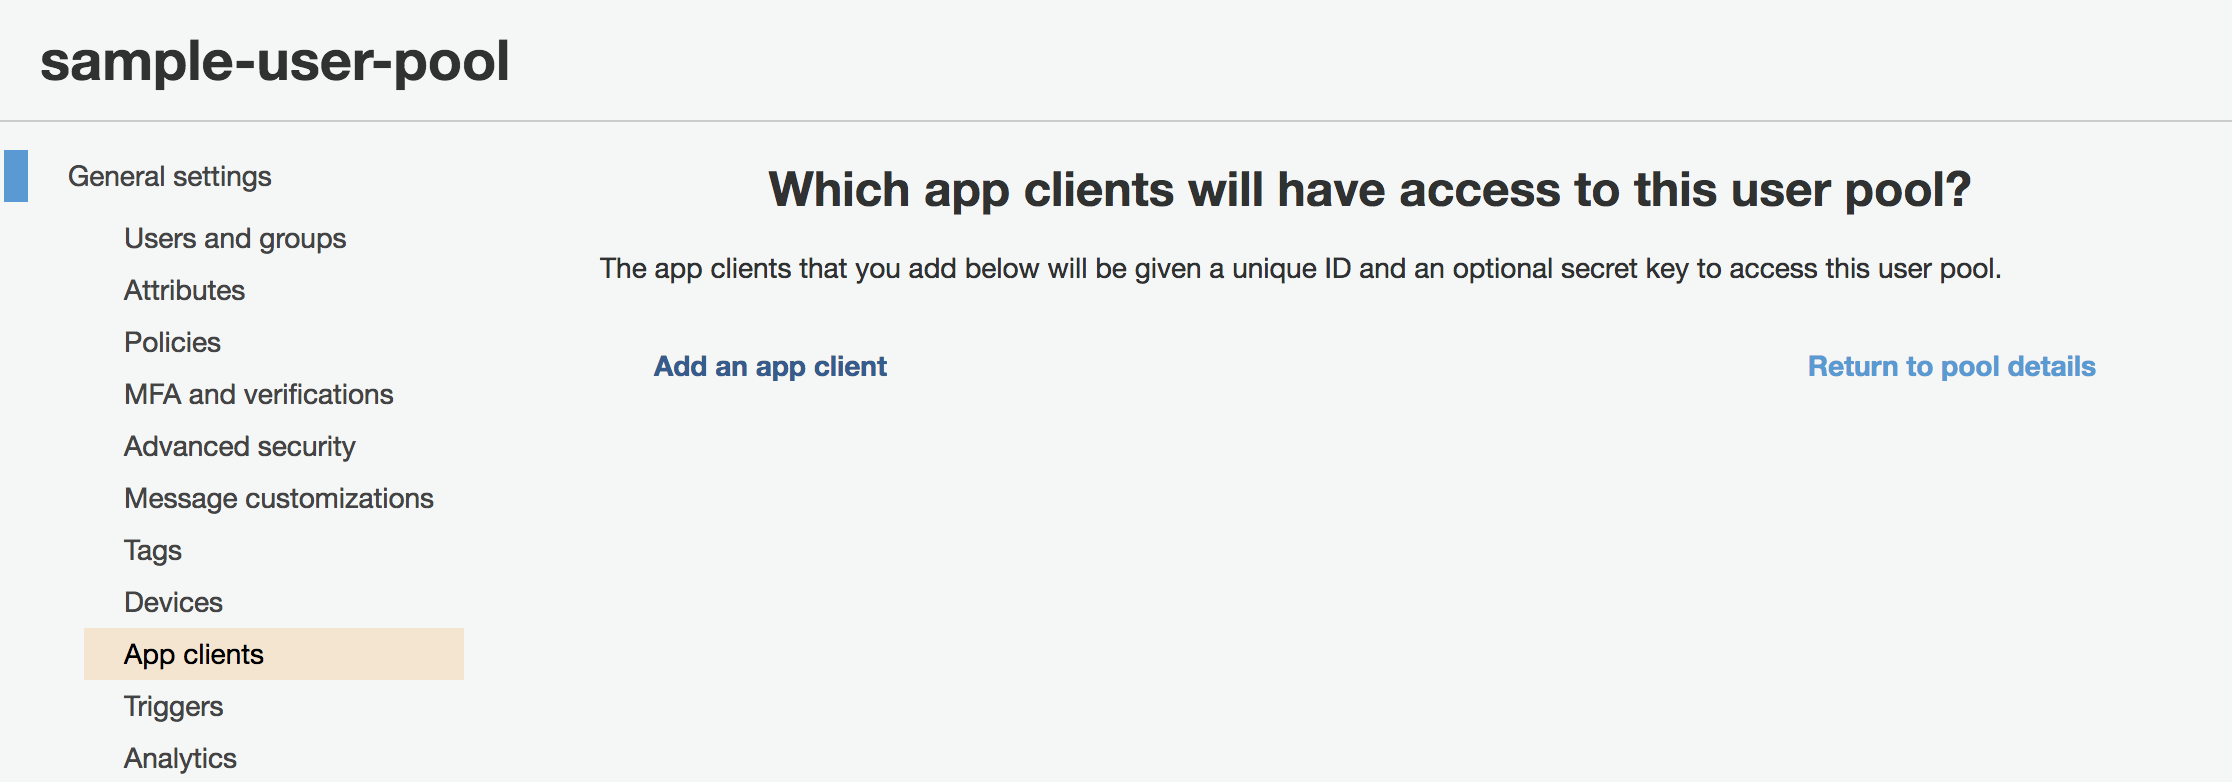
Under “General settings” in the side bar, click on “App clients”. Then, “Add an app client”.
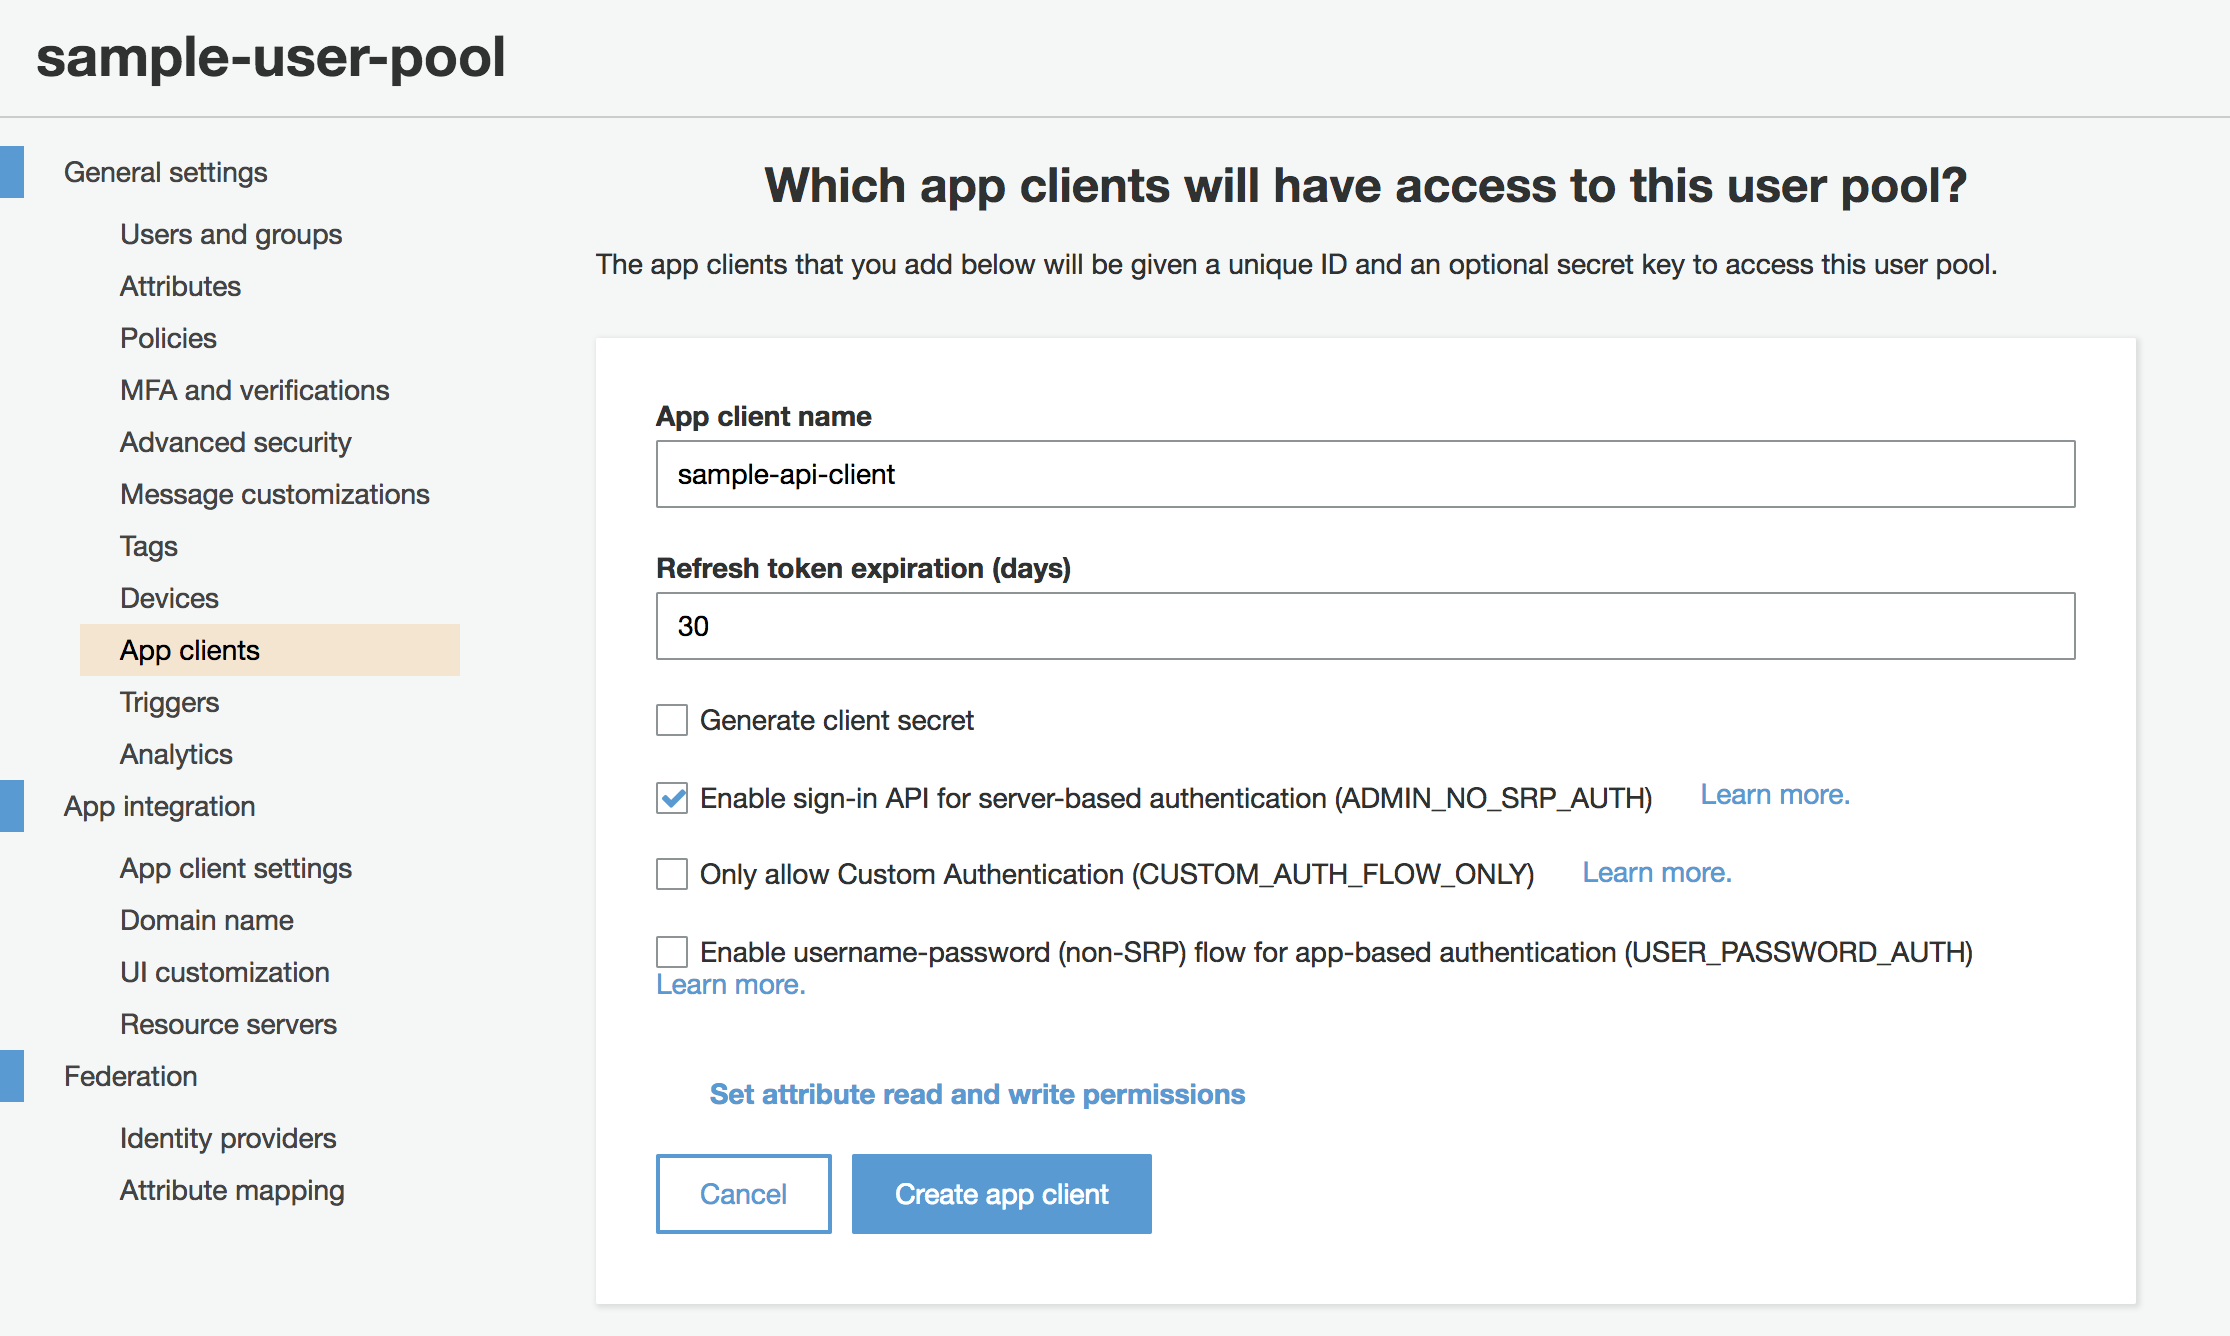
There are a few options here:
-
Choose a custom name for your app client, keeping in mind any future application that utilizes the same app pool will use a separate app client.
-
Check only “Enable sign-in API for server-based authentication”.
-
Do not check “Generate client secret”, “Only allow Custom Authentication” and “Enable username-password flow”.
Click “Create app client”.
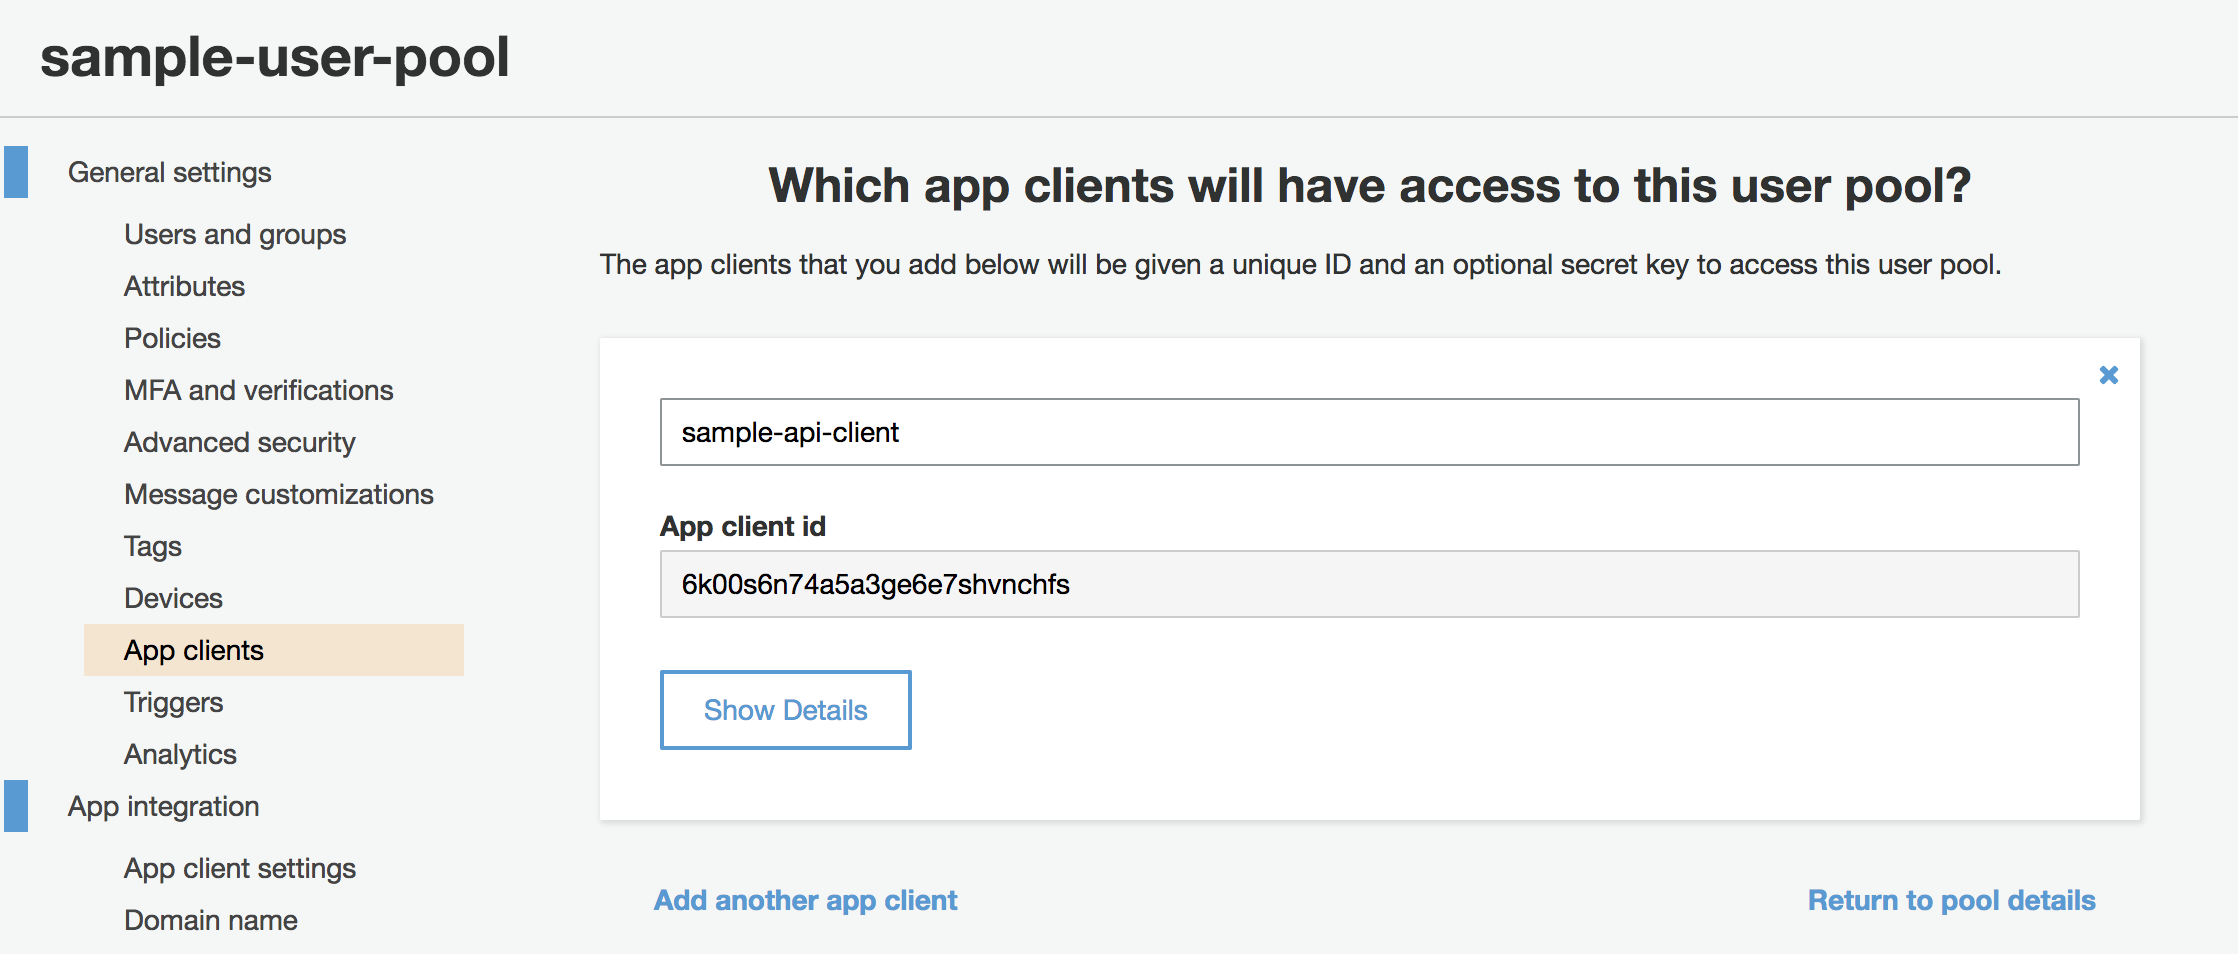
An “App client id” will be generated for your app client. Take note of this ID as we will use it soon to configure the Web API.
Add authentication to Web API
ASP.NET Core Web API applications configure Authentication in the Startup
class. Navigate to the Startup.cs file in your solution Now find the
ConfigureServices function. Above the call to AddMvc include the AddAuthentication and AddJwtBearer extension methods:
public void ConfigureServices(IServiceCollection services)
{
    services.AddAuthentication("Bearer")
        .AddJwtBearer(options =>
        {
            options.Audience = "Your App Client ID goes here!";
            options.Authority = "Your Authority URL goes here!";
        });

    services.AddMvc();
}
We are required to set just two options:
-
Audience represents the recipient of the token. In our case it is the App Client ID. To refresh your memory, it can be found in the AWS User Pools console under General Settings > App clients. This is typically a random string of characters.
-
Authority is the address of the token issuing authentication server. This will point to the user pool. For example, the authority for a user pool in the
us-east-1region will be the following URL:
https://cognito-idp.us-east-1.amazonaws.com/<userpoolID>
Not sure what your region is? Check the URL in your AWS console. It’ll be the same as the subdomain in the address bar like this:
https://us-east-1.console.aws.amazon.com
Can’t remember your User Pool ID? In the User Pool console, it’s written across the top of General Settings as “Pool ID”.
Note: If you don’t care for the magic string "Bearer", you can use JwtBearerDefaults.AuthenticationScheme from the Microsoft.AspNetCore.Authentication.JwtBearer namespace.
There is one other thing for the separate Configure function. You must add the Authentication middleware simply by including the following line:
public void Configure(IApplicationBuilder app, IHostingEnvironment env)
{
    ...
    app.UseAuthentication();
    ...
}
Authentication is now configured for the Web API application! You can secure any API controllers by using the [Authorize] attribute. For example:
[Authorize]
[Route("api/values")]
[ApiController]
public class ValuesController : ControllerBase
{
    [HttpGet]
    public ActionResult<string> Get()
    {
        return Ok("Success!");
    }
}
Let’s test this out. Run the application and attempt to hit your Controller. I use Postman for this.
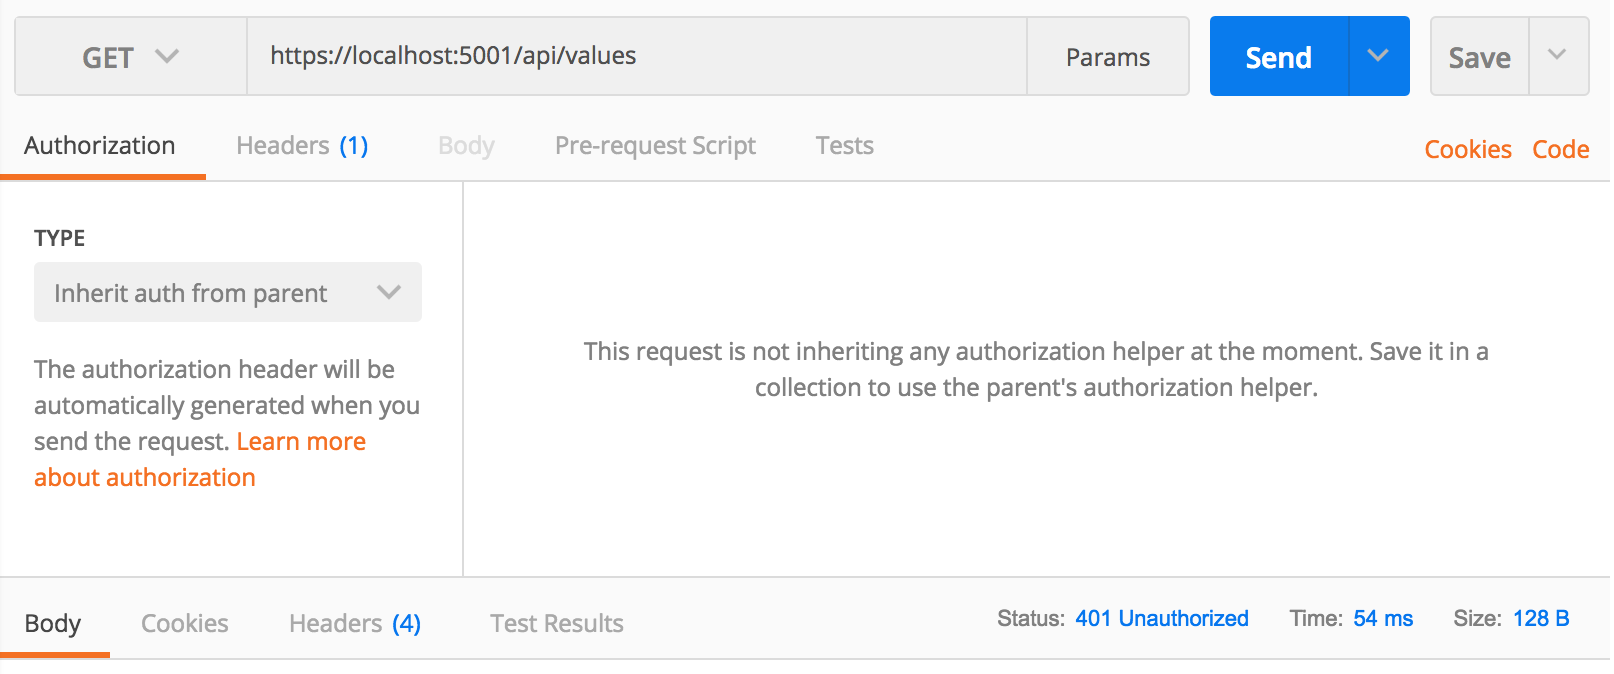
From the above example /api/values returned the status 401 Unauthorized which indicates we failed to authenticate. This is actually the behavior we want, since we did not provide a Bearer token!
Unfortunately we do not offer a way to retrieve Bearer tokens. Let’s mock out a sign-in flow in the next section so that we can verify our authentication code works.
Register Users
Create a new API Controller to deal with registering and authenticating users. For demonstration purposes this will be pretty simple.
[ApiController]
public class AuthenticationController : ControllerBase
{
    [HttpPost]
    [Route("api/register")]
    public async Task<ActionResult<string>> Register()
    {
        // TODO: Use AWS SDK to register the user
        return Ok();
    }

    [HttpPost]
    [Route("api/signin")]
    public async Task<ActionResult<string>> SignIn()
    {
        // TODO: Pull in AWS SDK and generate our Bearer token
        return Ok("The Bearer token!");
    }
}
We will need to pull in the AWS SDK as Nuget packages. This will allow us to initiate requests to our Cognito User Pool from code.
Open Nuget Package Manager for the solution and add both packages AWSSDK.Core and AWSSDK.CognitoIdentityProvider to your project.
Note! In order for the to work, the application needs two Environment Variables set: AWS_SECRET_KEY and AWS_ACCESS_KEY_ID.
If you haven’t generated these keys already: open up the AWS console home page, click your name in the top right corner, click “My Security Credentials”, expand the “Access keys” section and “Create New Access Key”. Set the Environment Variables for your project once they are generated.
Now we can fill out our Register method and start creating users.
[ApiController]
public class AuthenticationController : ControllerBase
{
    private const string _clientId = "Your App Client ID!";
    private readonly RegionEndpoint _region = RegionEndpoint.USWest2;

    public class User
    {
        public string Username { get; set; }
        public string Password { get; set; }
        public string Email { get; set; }
    }

    [HttpPost]
    [Route("api/register")]
    public async Task<ActionResult<string>> Register(User user)
    {
        var cognito = new AmazonCognitoIdentityProviderClient(_region);

        var request = new SignUpRequest
        {
            ClientId = _clientId,
            Password = user.Password,
            Username = user.Username
        };

        var emailAttribute = new AttributeType
        {
            Name = "email",
            Value = user.Email
        };
        request.UserAttributes.Add(emailAttribute);

        var response = await cognito.SignUpAsync(request);

        return Ok();
    }

    ...
}
Here are the few things going on in the above.
-
The newly defined class User will act as our payload to the controller methods. This contains all the data we need to register the User, and it will be passed in with the POST body.
-
First we initiliaze an instance of the Cognito Identity Provider Client. The constructor requires the region to be passed in, which I hard coded at the top of the controller. Ensure this region matches your User Pool!
-
Next we create a SignUpRequest and fill in the values from the User passed in to the method. Note that the ClientId is assigned here as well, which is hard-coded at the top of the Controller in a private property. Ensure this matches your App Client ID!
-
Additional registration attributes need to be added to the UserAttributes collection on the SignUpRequest object. Here an e-mail address attribute is added.
-
Finally we
awaittheSignUpAsyncfunction to register the user. ReturnOk()to indicate success.
Run the application and test it out with Postman.
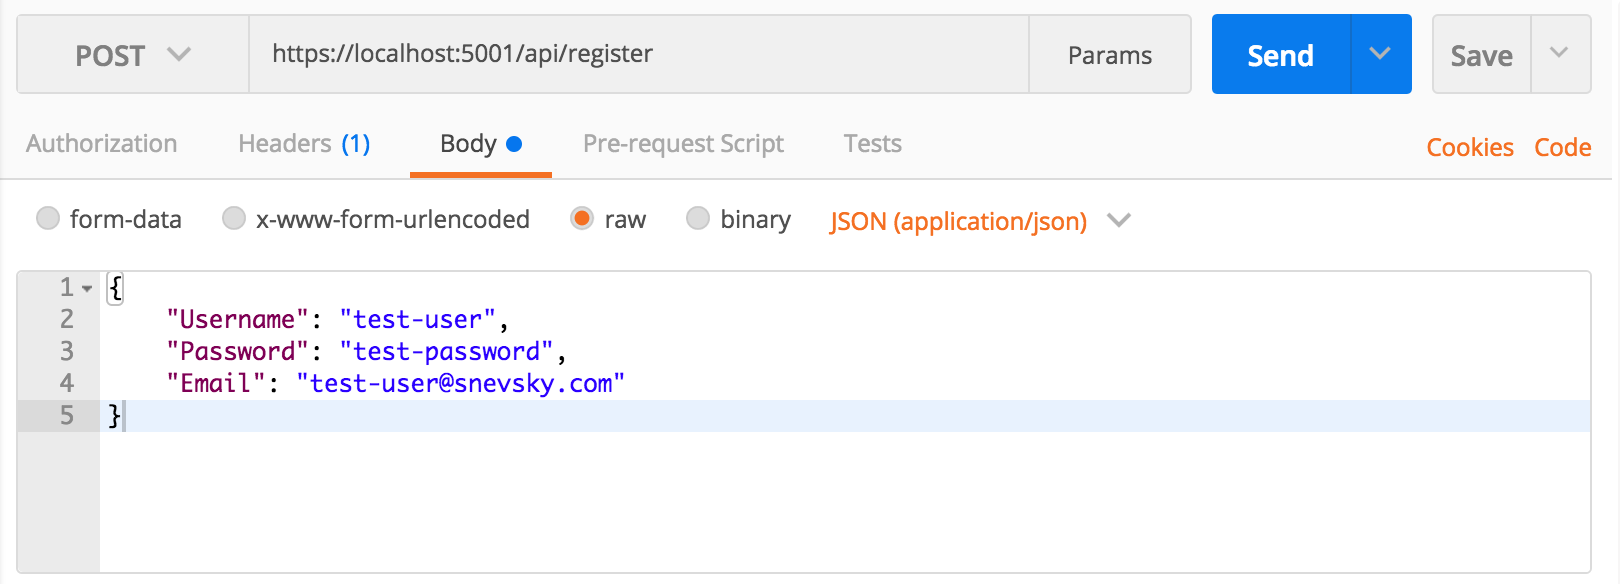
Call the route api/register as a POST and pass a User JSON object in the raw body of the request:
{
	"Username": "test_user",
	"Password": "test_password",
	"Email": "test_user@snevsky.com"
}
Send the request and expect to get back a status of 200 OK. If anything fails, such as password requirements, the exception details will be displayed as the response.
The first user has now been successfully registered with the Cognito User Pool!
However before this user can be used to authenticate, it needs to be confirmed. The easiest way to do this is now is manually through the AWS console:
Navigate to “Users and groups” under “General settings”. The newly registered user from above should be present on the list of users. It will be set as “Enabled” but “UNCOFIRMED”. Click the Username and confirm the user by clicking the “Confirm user” button. The user can now be used to authenticate.
Authenticate Users
Back in the API controller, modify the SignIn controller method with the following:
[ApiController]
public class AuthenticationController : ControllerBase
{
    ...

    [HttpPost]
    [Route("api/signin")]
    public async Task<ActionResult<string>> SignIn(User user)
    {
        var cognito = new AmazonCognitoIdentityProviderClient(_region);

        var request = new AdminInitiateAuthRequest
        {
            UserPoolId = "Your User Pool ID!",
            ClientId = _clientId,
            AuthFlow = AuthFlowType.ADMIN_NO_SRP_AUTH
        };

        request.AuthParameters.Add("USERNAME", user.Username);
        request.AuthParameters.Add("PASSWORD", user.Password);

        var response = await cognito.AdminInitiateAuthAsync(request);

        return Ok(response.AuthenticationResult.IdToken);
    }
}
There are some new things happening here:
-
We create an authentication request object that we will pass to the Cognito client. This requires the User Pool ID, the Client ID and authentication flow to be set.
-
Then we add the authentication parameters:
USERNAMEandPASSWORD. For convenience this method accepts the sameUserobject as before, so we use the data from that object to fill in these parameters. -
Finally we
awaitinitiating the authentication flow with Cognito. This returns a rich response object containing the Bearer token upon successful authentication. We can return the AccessToken on success.
Run the application to test this out with Postman.
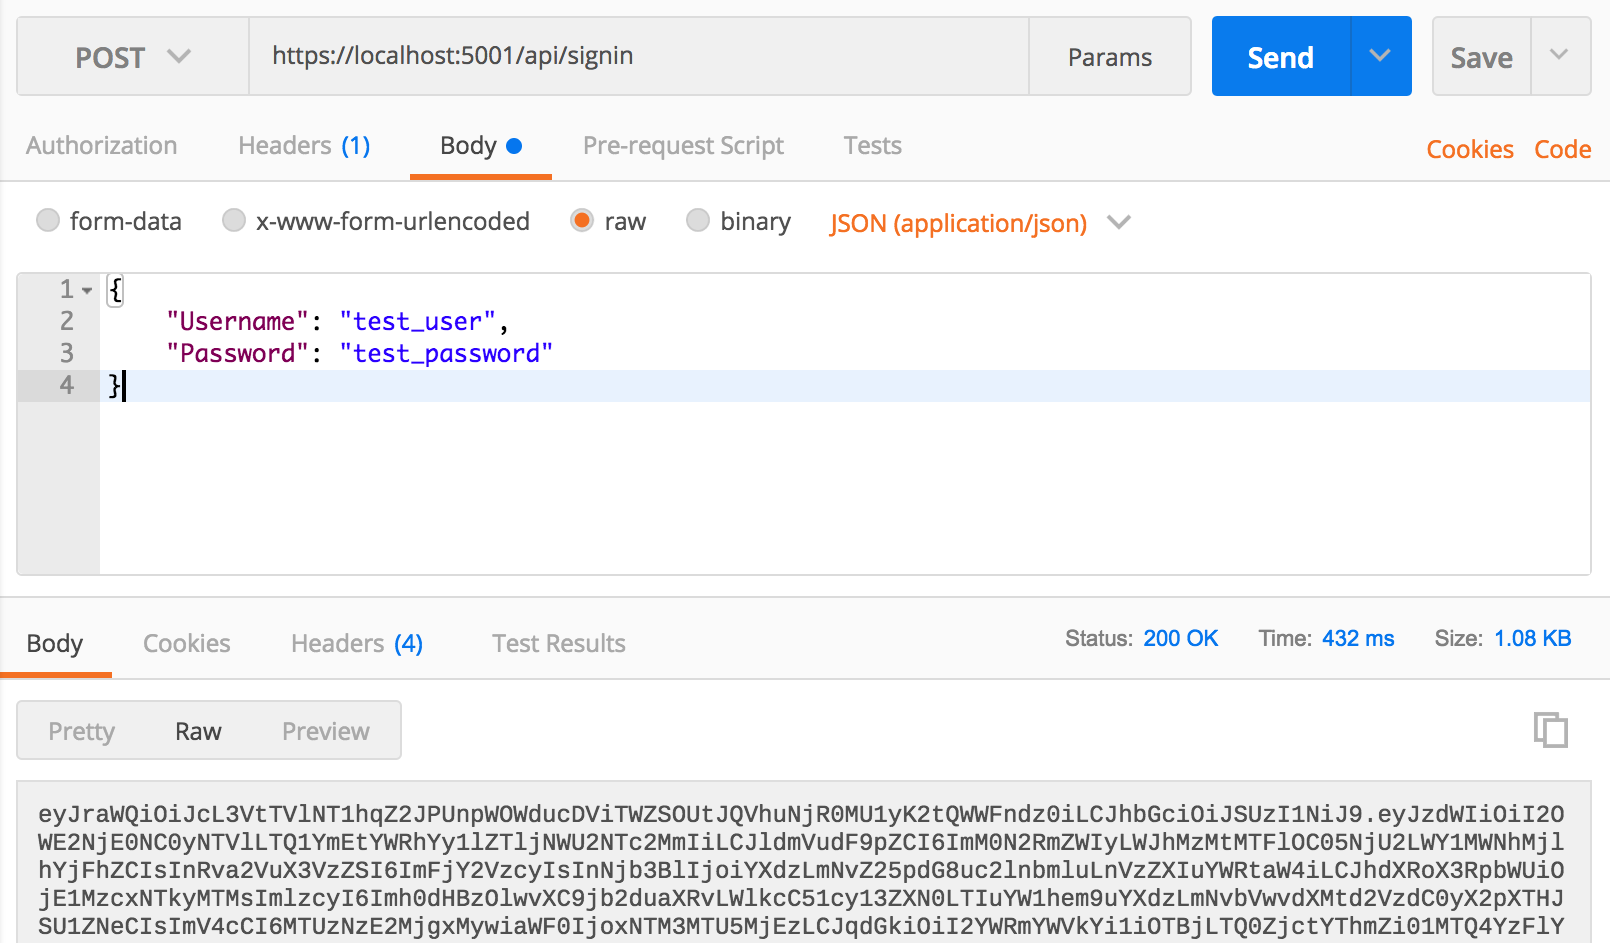
Call the route api/signin as a POST and pass the User credentials as a JSON object in the raw body of the request.
Upon success the API returns a status of 200 OK and the Bearer token. This value can now be used to authenticate the secured API controller: Recall from the Add authentication to Web API section, ValuesController was decorated with the [Authorize] attribute and returned a 401 Unauthorized upon request. This token should allow the API consumer to resolve this error.
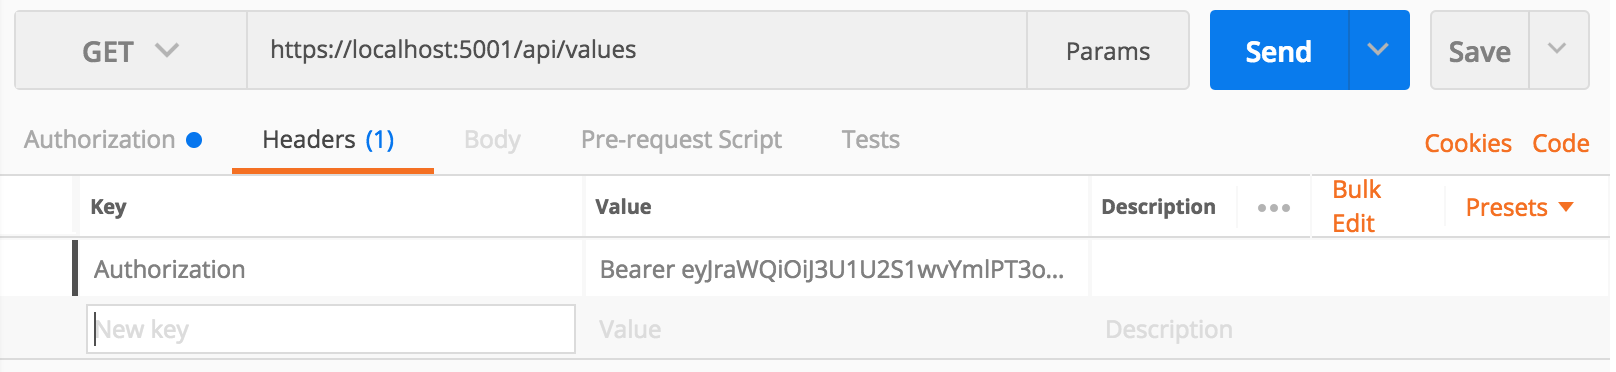
To pass the Bearer token to the API call, an Authorization header must be included with the request. The header Key is Authorization and the header Value follows the following format:
Bearer <Bearer Token Value goes here!>
Now send the request to GET /api/values.
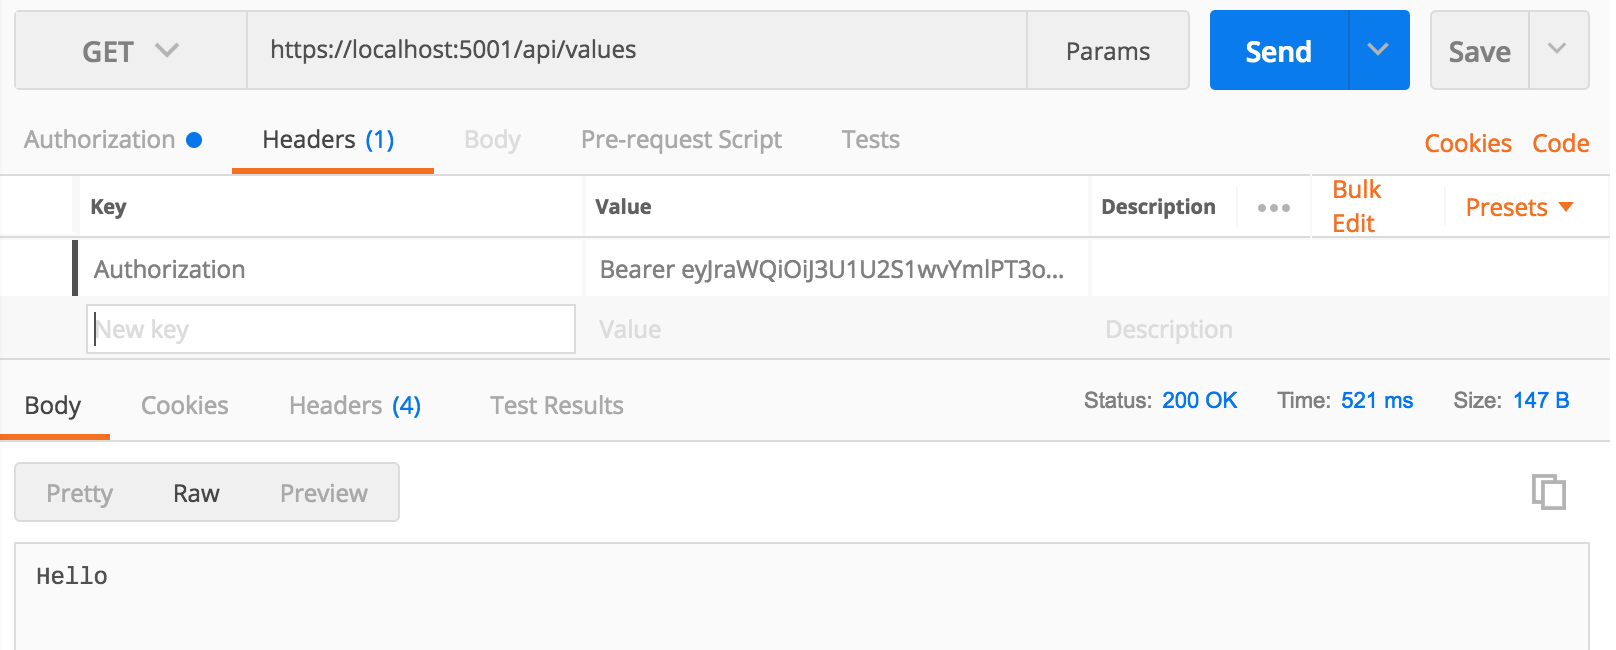
The response “Hello” should be returned with a status of 200 OK as expected.
This validates an entire successful flow of Authentication in ASP.NET Core Web API with Amazon Cognito!
Published on September 18, 2018 by Serge Nevsky.